Thin, oily, brine-dimpled Genoese focaccia
Focaccia Genovese (Genoese-Style Ligurian Focaccia)
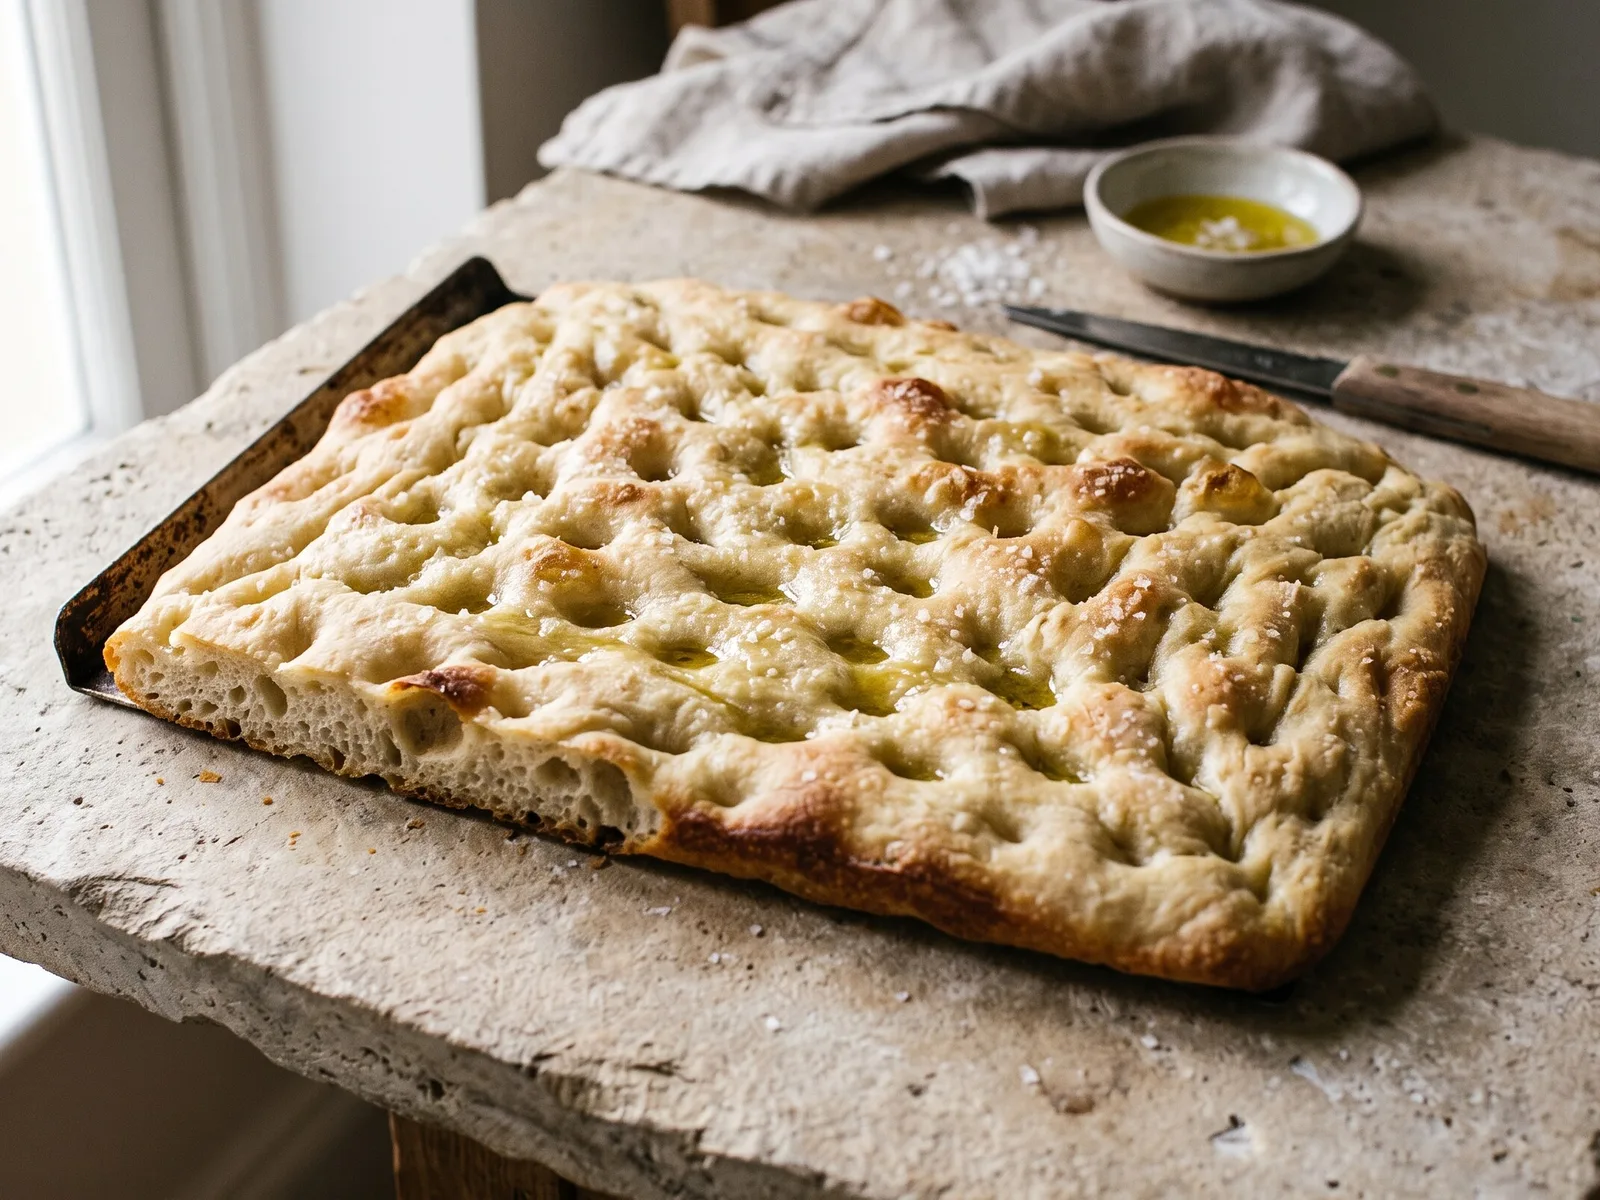
The Ligurian everyday classic: thin and low with a shattering oil-fried bottom, a soft salty crumb, and finger-dimples that pool with an olive-oil-and-brine glaze.
- Total
- 3.6 hr
- Hands-on
- 20 min
- Hydration
- 78%
- Skill
- beginner
By FocacciaRecipe editorial · Updated 2026-07-05 · In editorial development; independent bake-test pending
The short version
Make a soft ~78% hydration dough (500 g flour, 390 g water, 25 g oil, 10 g salt, 5 g yeast), proof it in an oiled 30×40 cm pan, dimple it, flood the dimples with a brine of 30 g water, 30 g oil and 5 g salt, then bake at 230°C/450°F for about 20 minutes until deep gold.
Why this works
A well-oiled pan shallow-fries the base crisp while the moderate-hydration crumb stays tender; the water in the surface brine turns to steam and keeps the interior moist as the oil conducts heat for even amber browning and the salt seasons every dimple.
The schedule
~30m hands-on of 3.6h total · same day
- Mix & fold · 30m
- Bulk ferment · 1.5h
- Proof · 1h
- Bake · 20m
- Cool · 15m
Terracotta is active work; olive is unattended rising; red is the bake.
Ingredients
Method
- 1
Mix
Whisk flour and yeast, add water, oil and optional honey, then salt. Mix to a soft, sticky dough with no dry flour.
Look for: Slack and tacky — softer than a pizza dough but it should still come together off the sides of the bowl.
- 2
Bulk ferment
Give the dough one or two stretch-and-folds in the first 45 minutes, then let it rise until visibly puffy and bubbled.
Look for: Bubbly surface and a jiggly, airy feel — roughly doubled.
- 3
Pan and rest
Oil the pan well, transfer the dough and gently coax it toward the edges. If it springs back, rest 15 minutes and stretch again until it fills the pan.
Look for: The dough relaxes into the corners without tearing and springs back slowly when pressed.
Avoid: Don’t force or tear the dough — let it relax between stretches.
- 4
Proof
Let the panned dough proof until light and pillowy.
Look for: Puffy and full of small bubbles; a fingertip leaves a slow-filling dent.
- 5
Dimple and brine
Whisk the brine ingredients until the salt dissolves. Press deep dimples all over with oiled fingertips, right down toward the pan, then pour the brine across the surface so it floods the dimples.
Look for: The dimples hold shallow pools of cloudy brine that shimmer across the top.
- 6
Bake
Bake at 230°C/450°F until the top is deep amber and the underside is crisp and golden.
Look for: Deep gold surface with browned dimple edges; lift a corner — the base should be firm and fried-looking.
- 7
Finish
Slide onto a rack and, if you like, brush with a little more oil. Eat warm.
Look for: Glossy top; the crumb stays soft and slightly oily inside.
What good looks like
- Crumb: Soft, moist and even — tender rather than dramatically open.
- Crust: Crisp fried base, glossy amber top, salty oil pooled in the dimples.
- Height: Low — roughly 1.5–2 cm tall.
- Color: Deep gold with darker dimple edges.
If something went wrong
| Symptom | Likely cause | Fix |
|---|---|---|
| Pale, dry surface | Not enough brine or oven too cool | Flood the dimples properly and bake in a fully preheated 230°C/450°F oven. |
| Dimples disappear | Dimpled too gently or dough over-proofed | Press firmly down toward the pan just before baking, while the dough still has spring. |
| Greasy, not crisp, bottom | Pan under-heated or too little rise | Use a metal pan, oil it well, and make sure the base sets and browns fully. |
Storing & reheating
Storage: Best the day it’s baked. Keep loosely covered at room temperature up to 1 day.
Freezing: Freeze cooled pieces up to 1 month; thaw at room temperature.
Reheating: Warm in a 200°C/400°F oven 4–5 minutes to re-crisp the base.
Contains wheat/gluten. Naturally dairy- and egg-free.
Tools & ingredients for this focaccia
Some links are affiliate links; as an Amazon Associate we may earn from qualifying purchases at no extra cost to you.
Core pantry
- Bread flour (opens Amazon) ↗ — High-protein bread flour or Italian “00” both work.
- Extra-virgin olive oil (opens Amazon) ↗ — Use a good EVOO you like the taste of.
- Fine sea salt (opens Amazon) ↗ — Fine sea salt for the dough.
- Instant yeast (opens Amazon) ↗ — Instant (or active dry) yeast keeps for months.
- Honey (opens Amazon) ↗ — Any good honey; hot honey for spicy bakes.
Required pan & tools
- Half-sheet pan (33×46 cm / 13×18 in) (opens Amazon) ↗ — The workhorse for thinner focaccia and focaccia pizza, with room for a crisp, wide base.
You don’t need to buy everything here — many items are already in most kitchens. Fresh produce, cheese and herbs are best bought local and in season.
Frequently asked
- Why is my focaccia genovese not oily and shiny like in Genoa?
- You likely skipped or skimped the surface brine — the salt-water-and-oil emulsion poured into the dimples is what gives the classic glossy, salty top.
- Is this the real IGP focaccia?
- No. This is a Genoese-style home version; the certified Focaccia Genovese is a protected Slow Food Presidium made to a stricter, lower-hydration specification.
Keep baking
In these collections
Source: https://www.focacciarecipe.com/recipes/focaccia-genovese · © 2026 FocacciaRecipe.com
In editorial development — this recipe has not yet completed physical bake-testing.